Riggott IMS is a cloud-based smart app that allows your company to handle, control and automate all your business information. This uniquely designed system will strengthen; help you bring onboard new processes.
The final part of the job process is to invoice the customer.
Once the salesperson has confirmed the job is ok to invoice – This involves going into their ‘Complete not approved’ tab and clicking to progress to invoice. The job then enters the tab ‘Awaiting Accounts’

Process
Awaiting accounts has a fundamental process of checks and confirmation before finalising the invoice, printing and posting to Sage.
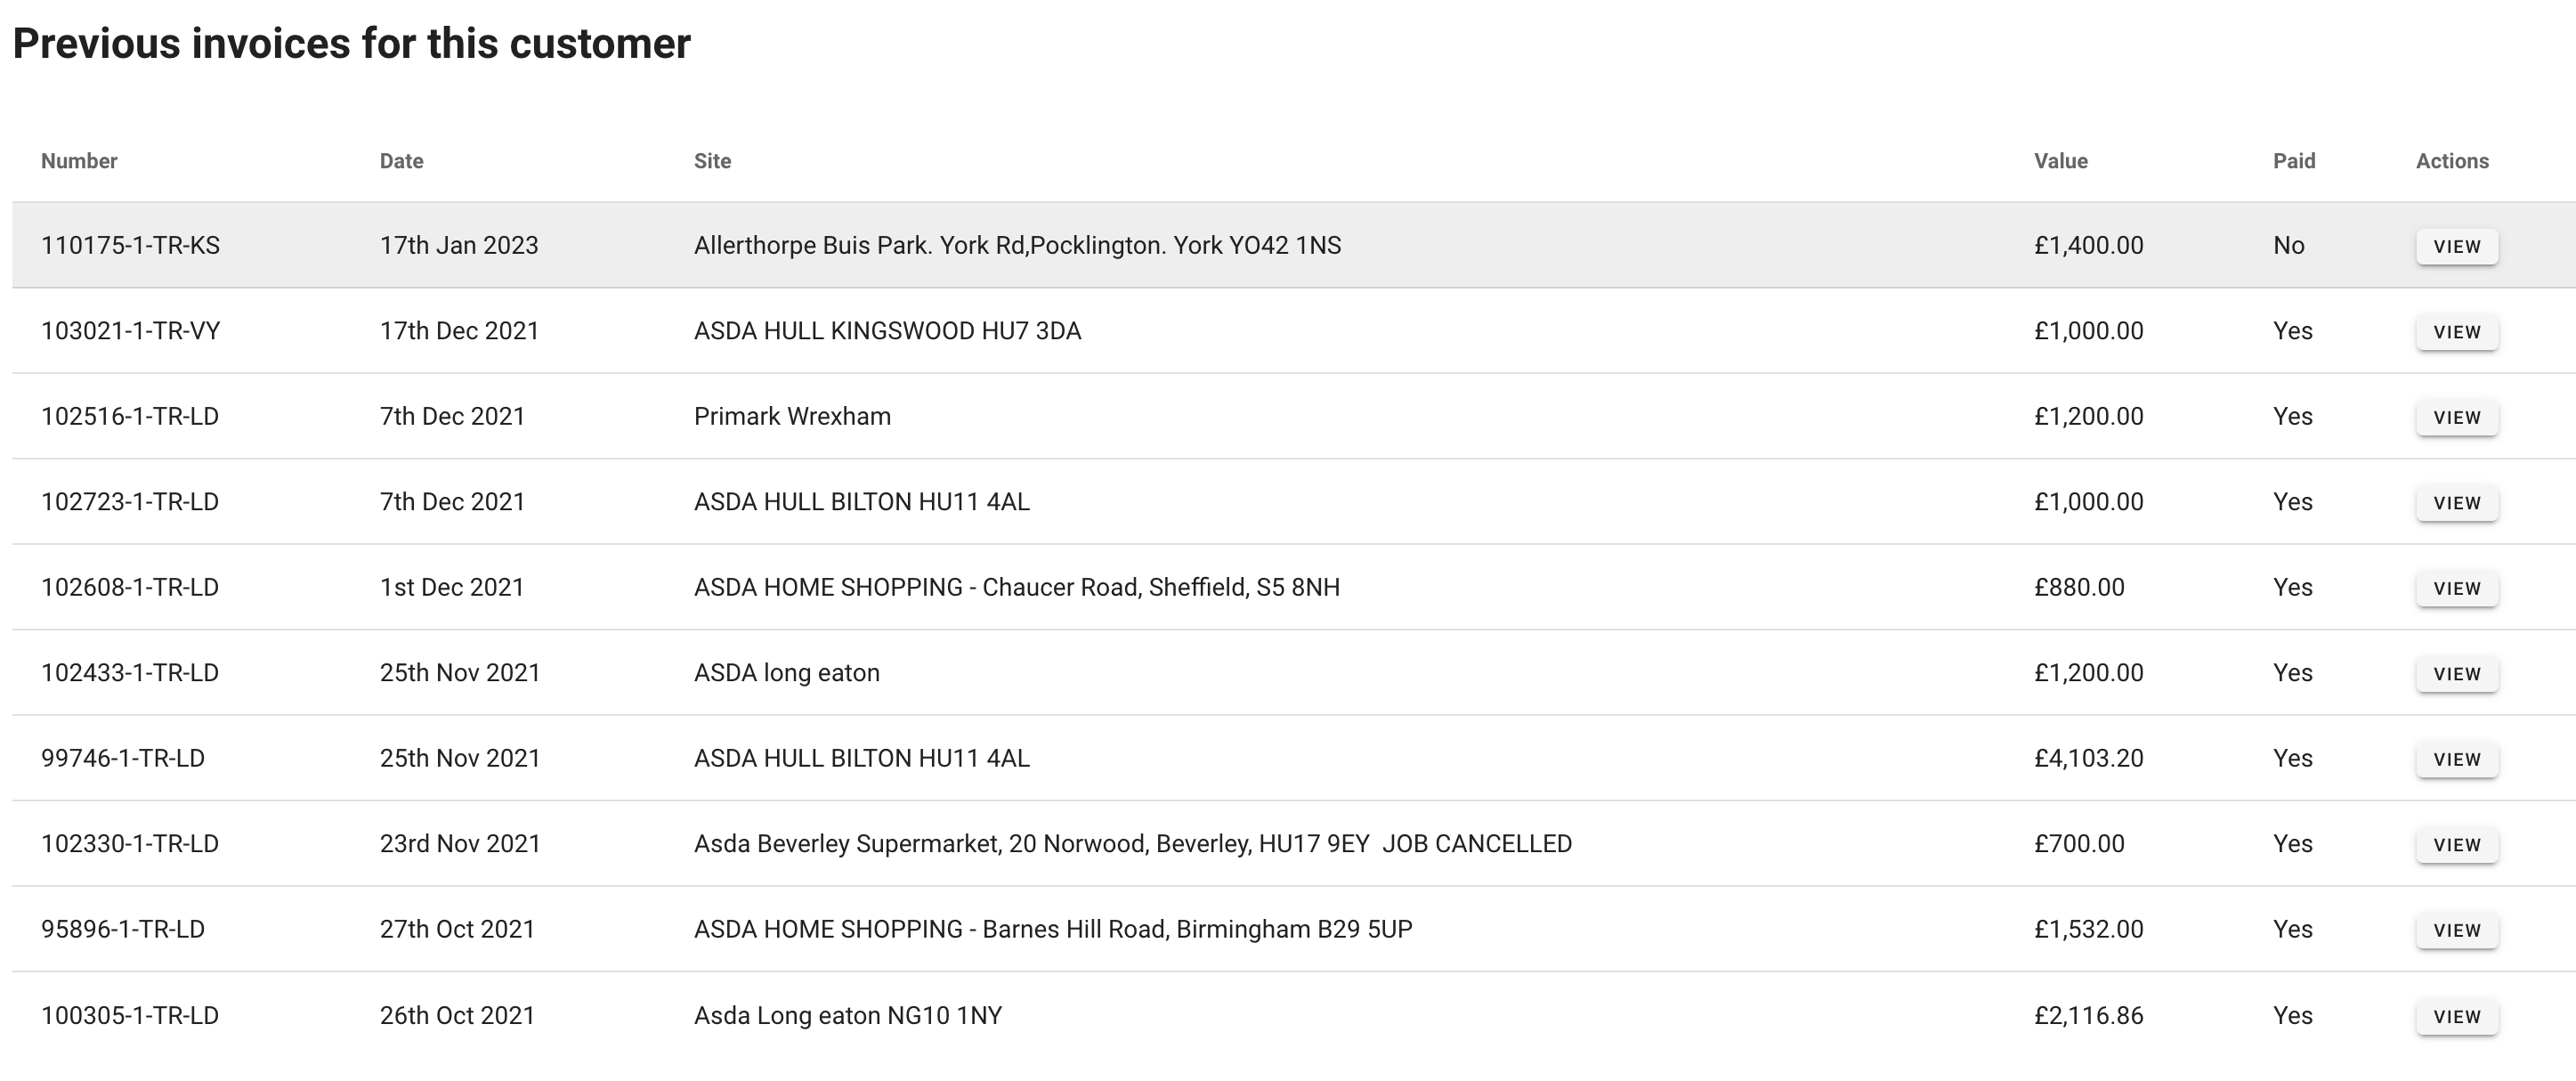
The opening list of jobs awaiting invoice allows the accounts department to check the salesperson, Sage ref and value before clicking view to complete the invoice.
The accounts person also has the option to search the list.
The top right-hand corner of the page is a total of the invoices in this list. As invoices are completed, the value reduces and as they are added, the value increases.
Job Overview
initially, you see the job status, including links to:
- View job card – Used by sales during the job process, still available to accounts for editing and checking.
- Add Remedial – Used by sales to create a remedial /99. Still, available to accounts to create.
- Forward to Awaiting accounts – – Used by sales when a DRS does not have a Total Job Complete ticked.
- Cancel Job – – Used by sales during the job process, still available to accounts for editing and checking.
- And Progress – Used to move the job to the next invoice stage – Once checked or edited.

Progress Job # [Job No and Sales intials]
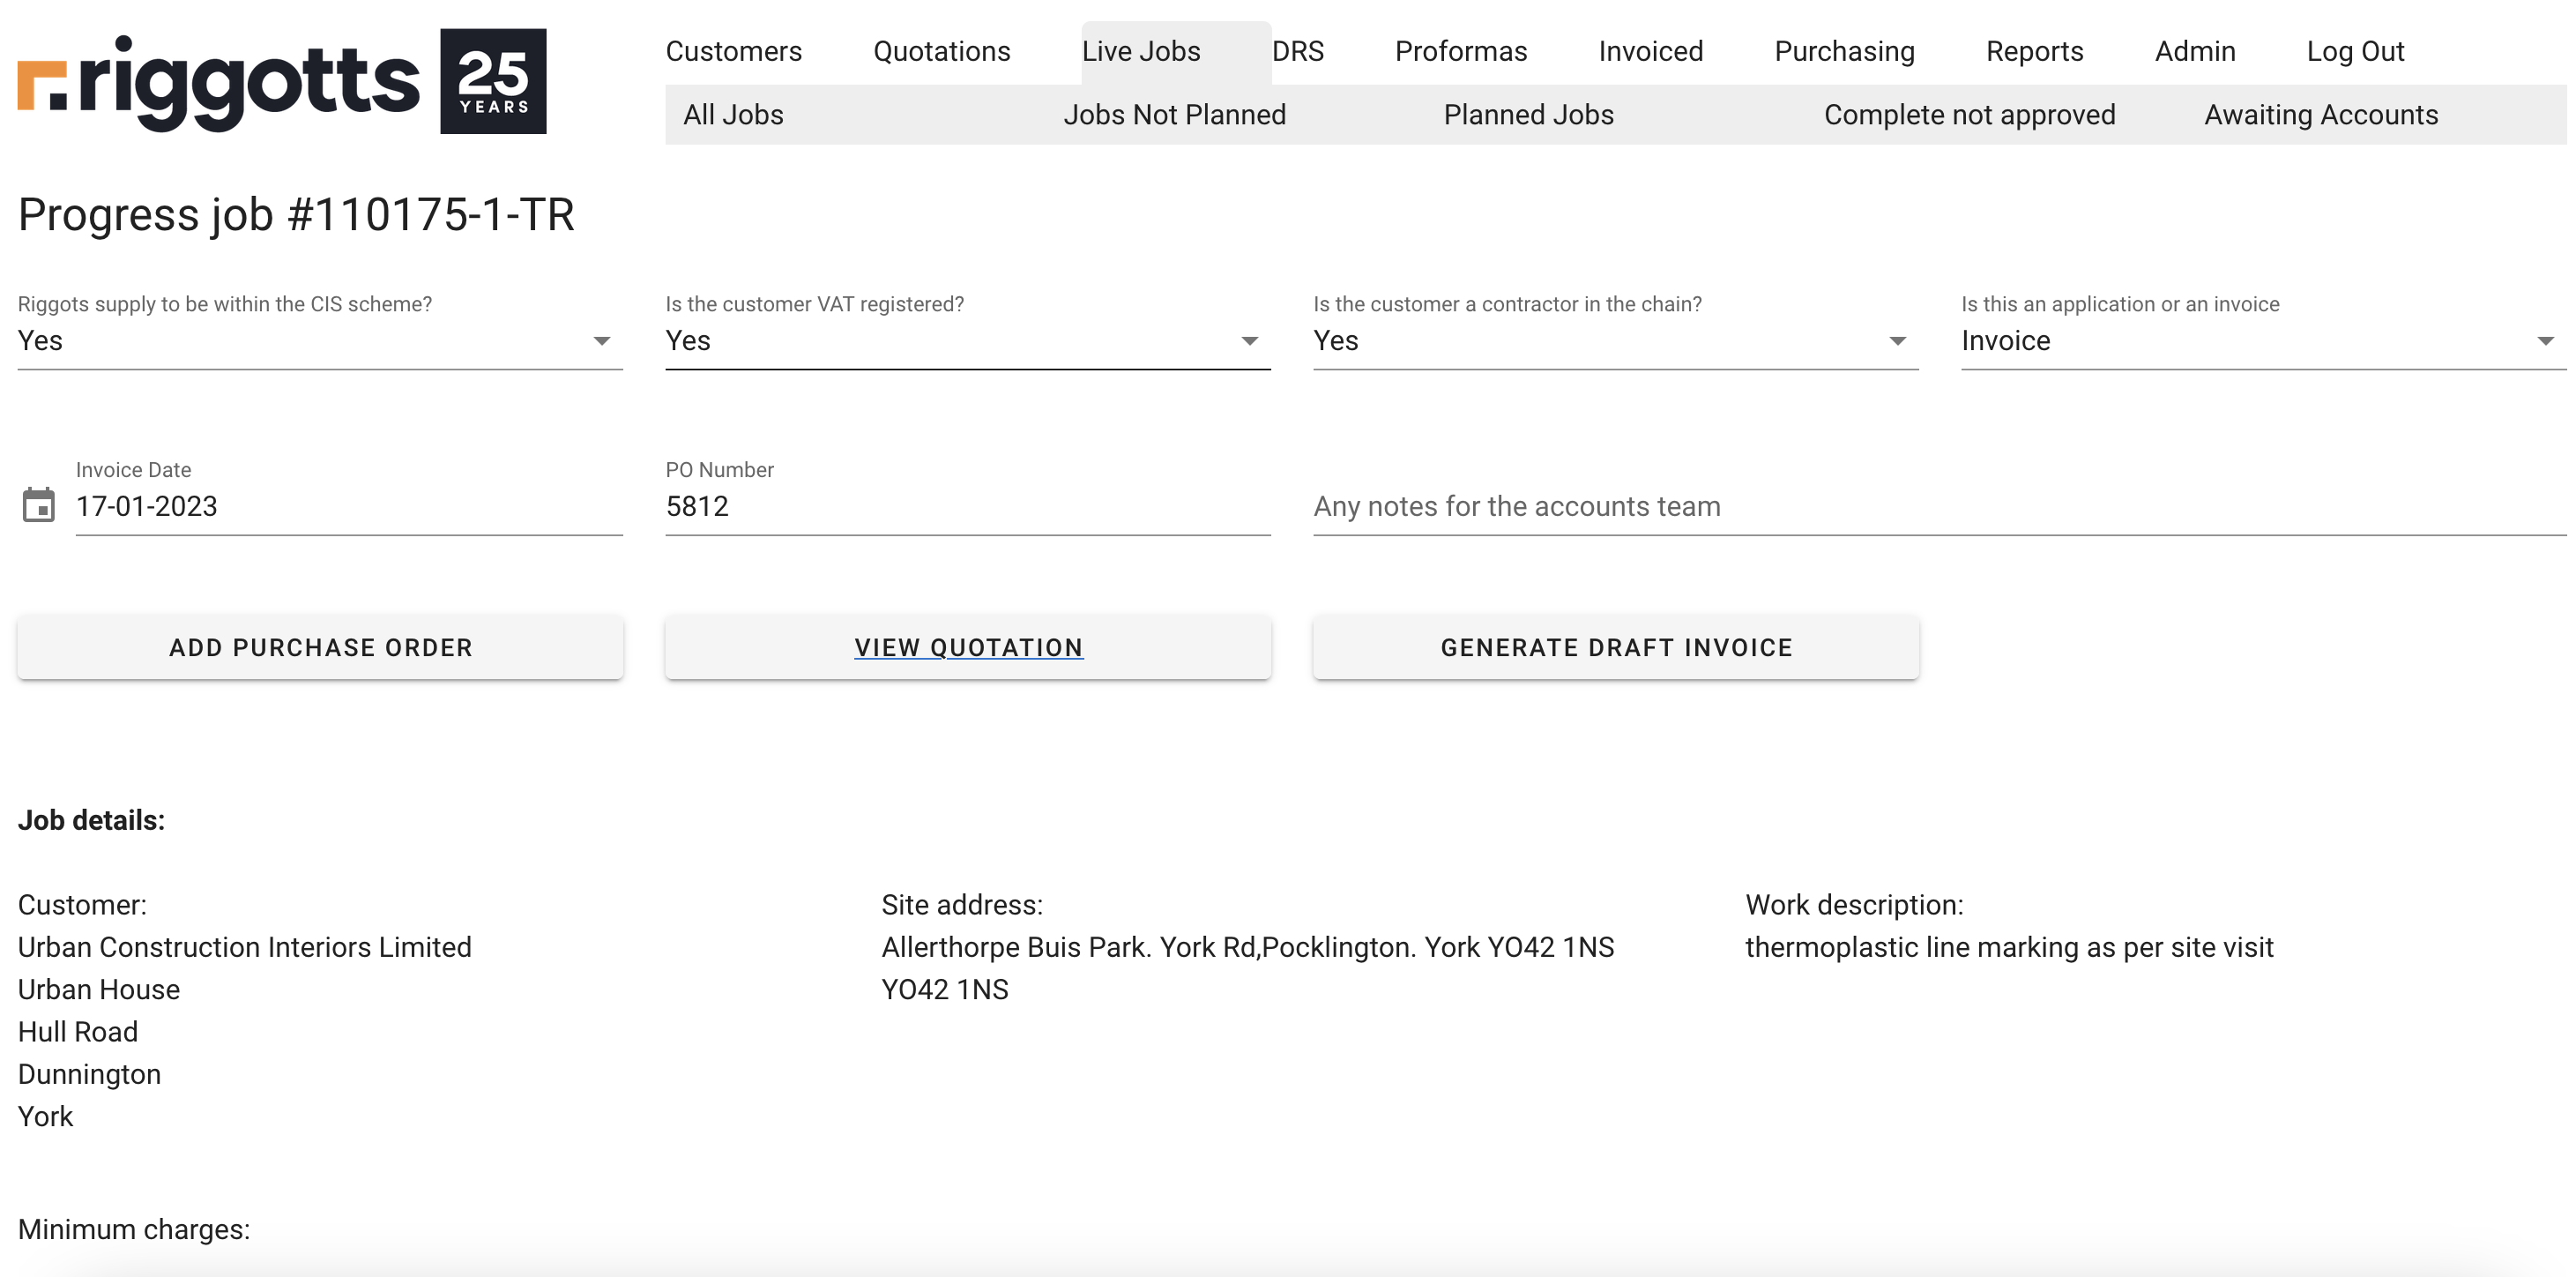
Specific fields have selections. These are essential requirements as they determine the type of invoice and HMRC rules surrounding reverse VAT charges.

A Purchase order Number can be added, and a copy of the Purchase order can be uploaded.
You can view the quotation at this stage, again, to check all information is correct and report concerns back to sales before progressing the job to the Draft invoice.

Generating Draft Invoice
With the correct question selections, invoice date, and Purchase Order No/Document added, you can select ‘Generate Draft invoice’.
As soon as you click ‘Generate Draft invoice.’ The job earlier in the ‘Awaiting Accounts’ list is then moved to ‘Draft invoices’ as it is now a draft invoice based on confirmed selection and details. And would be seen under the ‘All Invoices’ list and ‘Draft invoices’ List.
If you do not click ‘Generate Draft invoice.’ the invoice will not move, remaining under ‘Awaiting Accounts’
Finalising Invoice
Once ‘Generate Draft invoice; is clicked, the next screen you will see will show the invoice status as ‘Draft Invoice’ shown below is highlighted yellow.
Note: The job has now moved from ‘Awaiting Accounts’ to ‘Draft invoices’, which is also shown under ‘All Invoices’ And under the All invoices list and Draft invoices list, the status (left-hand side) is now ‘I’ – shown in the below image.

You will also notice when you click the view button, this link will take you directly to the below screen for you to compete for a final check and edits before finalising.

The additional button here is ‘Finalise’
You still have full editing rights and options to add notes in the main description section of the invoice.
You can also edit the Delivery Location and Contact details which have been automatically imported from the job quote.
Once you have checked all details, added nominal values equal to the quote value and completed further required edits, you can finalise using the button ‘Finalise.
A message will ask you to proceed or cancel this action.
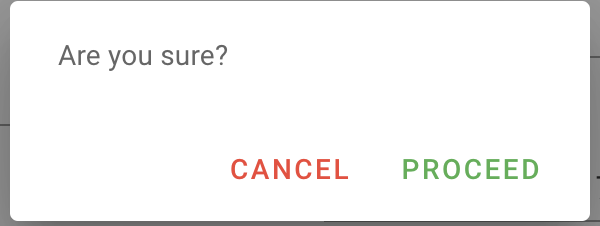
Click Proceed. The IMS will confirm the invoices have been posted to Sage.
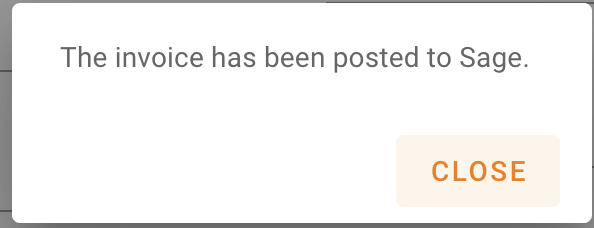
Invoice posted to Sage
You will notice under the Invoice list the invoice status has changed from ‘I’ to ‘S’ as the invoice has been finalised and posted to Sage.
The invoice will show under the transaction list in Sage, and the customers’ profile, including the nominal and departments.
Customer Profile Updates
Confirming the completed invoice will automatically update the customer’s profile: Spend to Date and Current Balance.